As he gears up for a co-headlining tour with Ozzy Osbourne guitarist Gus G., Marty Friedman has 13 solo albums of his own material to pick through. He’s going on the road in support of his latest album, Inferno. The album includes guest appearances by Alexi Laiho, Danko Jones, Rodrigo Y Gabriela, and Jason Becker, and offers the most uncompromising music of his career.
Inferno sounds like maximum-strength Friedman… with no artificial additives.
Definitely. A lot of factors go into the kind of record you’re making. As an artist, you try to ignore everything and just make the best album you can. Some of those factors – like record-label recommendations or your manager telling you to be more like this or that – tend to creep in. I’ve been lucky that they haven’t crept in so terribly much in my career, but this time I was like, “F**k everybody!” On this record, I am not listening to anyone, and I’m not doing anything that I’m not completely in love with. For better or worse, it’s really pretty much my bag right there.
When you were in the writing stage, did you know you were going to have guests on the record?
I knew that I wanted to have some cool guests on the record, but I didn’t want it to be the typical thing where a guest comes in and just plays a solo on a song. That has been done to death, and I’ve done it, too. This album was all about breaking those kinds of typical things. I wanted a commitment. I wanted to work on a song together so it really was like we’re in a band together – our band for that one song. I wanted to make something we both have an investment in.
I wrote the songs with the actual guest; a lot of time, it’s their song. I just rearranged it, produced it, and played my guitars on it. It’s like a complete band rather than a guest performance. For me, it was the best decision I ever made. I wanted something deeper, and I got it.
How did you go about getting Rodrigo Y Gabriella to guest?
The idea was to have guests who were influenced by me in some way, and they’ve mentioned my influence several times in the press. I hadn’t met them, but the record company suggested I go see them play in Tokyo. So, I met them and they were absolutely the sweetest people. They were the first to immediately jump on and do the record. I became a fan of theirs that night.
Regardless of how popular a player is or how well they’re doing, there’s something about playing on someone’s album whom you respect as a fan. You get this kind of excitement.
What went into getting Jason Becker?
We’ve been best friends forever. I didn’t know if he was up for doing a collaboration like he and I used to do in [the ’80s speed metal band] Cacophony, but when I saw his movie, Not Dead Yet… there’s a scene where he’s working on a piece of music with his dad. I called him and asked if it was being used for anything. He said, “No, I’m not using it… And I have a bunch of other stuff, too. Let’s make a song.”
It was exactly how we used to write in Cacophony. I’d have the basic outline of an entire song and take a bunch of his ideas and stick them in where I thought they would go nicely. The only difference is he wasn’t able to play the stuff he wrote. I had Ewan Dobson play the role of Jason on the acoustic parts, and he just tore it up. He was mind-boggling in capturing Jason’s spirit. It was like Jason was in the room.
Danko Jones does an awesome job on vocals.
If Danko and I were in the same band, that’s exactly what we would sound like. Inferno has more ripping on it than any of my albums before, but Danko and I in the same band would be the coolest thing. When he got onboard, I was very excited.
I love my playing in a band context. Being a solo artist, you’re in the front all the time. It’s a little bit awkward for a guitarist to be the front man. It takes a lot of ego, and patience from the listener; I can’t really listen to guitar in the front all the time – it sounds so much better after a vocal in a lot of cases. I really wanted to have that vocal stuff to play off of, and a band context for a lot of the record.
This article originally appeared in VG July 2014 issue. All copyrights are by the author and Vintage Guitar magazine. Unauthorized replication or use is strictly prohibited.
The members of Lionize blend heavy rock with reggae to create infectious tunes… kind of like if the guys in Deep Purple were Rastafarians wrapped in trippy sci-fi imagery. Nate Bergman is the SG-wielding architect of the group, and recently shared the strategy on the band’s latest album.
You guys worked hard on Jetpack Soundtrack.
We’re a rehearsal-oriented band; we demo’ed for a year, and when home, Monday through Friday from 11 a.m to four p.m., we go in the basement and jam. We spent six months doing that; we record, listen back, and get a feel for the sound – tempos and ideas.
One of the producers, Jean-Paul Gaster, has a great studio in his house, and we spent eight months there taking ideas and trimming the fat. He was a huge part of finding the [best] parts.
Are you a riff collector, or do you make up stuff together?
All of the above. Six times out of 10, we’re coming up with it off the cuff, just jamming. Someone might have an idea for a melody; sometimes, Hank has a bass line, or Chris will come with most of a tune. If most are more upbeat and rock, we’ll approach one with a slower, sort of reggae, vibe.
There’s cool use of dynamics on the record.
Dynamics have been missing in rock bands. Our favorite bands – Deep Purple, Sabbath, Led Zeppelin – they’re so multifaceted; it’s heavy, it’s loud, then suddenly it’s an acoustic guitar with tablas. It’s boring if you don’t look for new ways to present a song; dynamics and volume are an easy fix.
You keep changing your rig.
I wasn’t satisfied with how older Marshall plexis thin-out and the newer ones don’t sound like the old ones, so I had an amp built by Brooks Harlan, of Big Crunch. He makes an amp called the One Knob. It’s basically my hybrid of a JCM800 and a plexi. It’s 120 watts, and you just turn the knob up. Then, I got hip to the Laney Pro Tube heads. My rig blended two Laney heads with a treble booster in front of a plexi. The One Knob was on every track, with the SG or a thinline Tele.
Are you a pedal guy?
I’ve investigated tons of modern pedals and tones, but it never gets better than an SG into a tube head turned all the way up with some Vintage 30s. I’m a firm believer that your Volume knob is your boost, but I have a Dunlop MXR Classic Blue Box Octave Fuzz. I also have a 1972 Thomas Organ Wah, a Line 6 DL4, a Keeley Java Boost, and a couple treble boosters.
What are the specifics on the SG?
It’s an ’06 Classic. A friend makes pickups and wired a pair of humbuckers that blend a P-90 and a humbucker. I also had fatter frets put on, and Grover tuners.
There’s less reggae on the new album.
It’s present, but merged with other sounds. To me, there’s a syncopated bass-and-drum thing that makes it reggae. We’re a rock band that loves reggae, funk, and jazz. Jetpack Soundtrack is the evolution of that sound.
This article originally appeared in VG July 2014 issue. All copyrights are by the author and Vintage Guitar magazine. Unauthorized replication or use is strictly prohibited.
Ronnie Earl’s playing hasn’t changed a lot over the years, but listening to a new record by him is always a pleasant surprise. It’s rare to hear a guitarist who can take his time playing the blues and still play with such fire. This album continues that streak with mostly instrumentals blended with a few vocals by guest Diane Blue.
Blue contributes to one of the highlights on the record, a cover of the Sam Cooke classic “Change Is Gonna Come.” The soulful vocal is a perfect match with Earl’s guitar work.
The guitarist, as always, takes a turn or two not expected. “Time To Remember” is a jazzy tune with a Latin feel and a solo that builds wonderfully. Few guitarists in this genre tell a story like Earl.
He also is one of the true masters of a slow blues tune. His solo on “In The Wee Hours” stays clear of blues clichés while capturing the music’s beauty with ease.
“Runnin’ In Peace” is the perfect finish for the record, addressing the Boston Marathon bombing. It starts as a country blues and finishes with an aggressive Earl solo.
This article originally appeared in VG‘s January ’15 issue. All copyrights are by the author and Vintage Guitar magazine. Unauthorized replication or use is strictly prohibited.
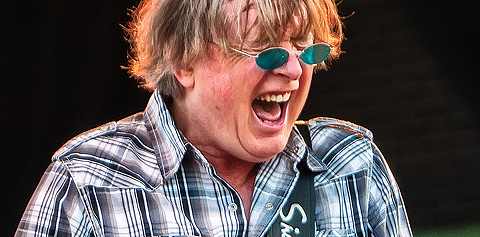
Simmonds onstage with his Zion guitar at the Windsor Blues Festival. Kim Simmonds: Arnie Goodman.Under the aegis of founder Kim Simmonds, Savoy Brown has always been a band “subject to change.” Formed in 1965, some of its incarnations went on musical tangents, but the blues has been its keystone genre.
The band’s most recent album, Goin’ to the Delta, is a return to basic electric blues, with Simmonds reassuming lead vocals in a guitar/bass/drums format. Pat DeSalvo plays bass, while Garnet Grimm plays drums.
“There’s so much involved – personal feelings, [the] actions of those around you, and ‘the muse,’” Simmonds said of the band’s “go with what you know” approach. “All I know is that the new album has resonated with people.”
Simmonds has also garnered recent praise for a solo acoustic blues project that built his confidence as a vocalist. Accordingly, the new album is credited to “Kim Simmonds and Savoy Brown.”
“I felt I was making a statement, and putting my name in front emphasized that point,” he said. “The marquee name has changed over the years; ‘The Savoy Brown Blues Band’ was how it first appeared, and it has changed here and there in an attempt to keep things fresh – simply ‘Savoy Brown’ or ‘Savoy Brown featuring Kim Simmonds’ etc.”
Its songs were penned by Simmonds, who noted influences including “…Albert Collins on ‘Backstreet Woman,’ Lonnie Johnson on ‘Just A Dream,’ and B.B.King, plus Chicago musicians like John Primer and Magic Slim.”
He has been through numerous guitars over the decades, and another facet of the full-circle approach on Goin’ to the Delta is the Zion guitar shown on the cover; he has used the instrument for more than 20 years.
“I used it on all tracks except the slide songs,” Simmonds averred. “It has a hard, generic, non-colored sound that was perfect. Plus, it’s a guitar few people in the blues world use, so I knew it would be a different sound to listeners’ ears. I primarily used the middle pickup to get a less-colored sound – bright, but without the treble pickup. I was looking for a guitar tone that wasn’t immediately identifiable.”
For slide, he relied on a DBZ guitar. DeSalvo, meanwhile, holds down the low-end with a G&L Climax Bass.
“He plays an important role, musically, and manages me on the road!” Simmonds said. “Pat has come into his own these past few years. He’s classically trained, yet able to rock out. I’m not sure why the trio works so well with Pat and Garnet; it’s probably simple chemistry.”
The approach to recording the album was also basic, and any rhythm guitar parts were utilitarian, though the instrumental “Cobra” has a rhythm part that’s more up-front in the mix.
“There is rhythm guitar on most of the tracks, but I deliberately didn’t play counterpoint, so the overdub is simply part of the drums and bass. That’s how I conceived the songs and production.”
The mix on “When You’ve Got A Good Thing” is different, as well, and includes a light reverb.
“The nature of the song demanded a slightly different approach,” Simmonds said. “The album was recorded quickly, with me playing and singing live. We wanted spontaneity.”
Asked about favorite songs, he lists “Laura Lee,” “Sad News,” and “Nuthin’ Like The Blues.”
In concert, he relies on a Heritage guitar and the DBZ for slide. Simmonds also has the future mapped out for his ongoing musical efforts.
“My next release will be an acoustic album of instrumentals called Jazzin’ on the Blues,” he said. “I’ll tour Europe and the U.S., and this summer, I’ll tour with Johnny and Edgar Winter, and in 2015, do the Rock Legends Cruise.”
Simmonds faces the future with a positive attitude.
“This is how life should be – the older you get, the better you get. After all, age teaches you!”
This article originally appeared in VG July 2014 issue. All copyrights are by the author and Vintage Guitar magazine. Unauthorized replication or use is strictly prohibited.
When Gary Clark, Jr. appeared on the national scene, music fans on the Internet suddenly became blues experts. Opinions burst like flak guns on D-Day with everything from shortsighted Jimi Hendrix comparisons to “I don’t get it” mystification. Even with a thumbs up from Eric Clapton, and visceral performances at the Crossroads Festival, it wasn’t enough to earn Clark his due.
In a climate where musicians like Matt Schofield and Philip Sayce are considered top-tier blues guitarists, Clark’s authentically rooted in an Albert Collins less-is-more approach, finds contemporary blues fans leaning toward the John Mayer school of post-SRV burglary.
When Clark’s Blak and Blu was released in 2012, these so-called blues fans were shocked to discover that a young, forward-thinking 28-year-old black guitar player enjoyed contemporary R&B, neo soul, and hip-hop. Some thought the album was “all over the place,” but didn’t consider the fact that the artist was performing 100 percent Black music. That album, though a little slick, is consistent if you think about it in that light. The idea that early blues artists played blues exclusively is a myth.
On Gary Clark Jr. Live, he abandons the slick for the gritty, and serves a 12-course meal of low-tech, high-groove, and dirty rumble. It’s a seamless package that embraces the blues, but isn’t restricted by it.
Clark knows where his bread is buttered and pumps out back-catalog gems like “Cat Fish Blues,” “Ain’t Messin’ Around,” and “Next Door Neighbor Blues.” He sings the hell out of these tunes with soul, conviction, and legitimacy, while his Epiphone semi-hollow body guitar and Fulltone Octafuzz seem to have usurped the Strat and Tube Screamer.
Clark rock and rolls on the Chuck-Berry-esque “Travis County,” gets psychedelic on “Third Stone From The Sun,” and displays his Eddie Kendricks falsetto on “Come On Home.” The shifts in style are effortless. “Don’t Owe You A Thang” takes us to the swamp with bayou fingerpicking and raunchy Texas slide. The band is on fire throughout, pushing Clark into fresh improvisational territory.
Everything shines on this two-disc set. From the lush solo chording on “Blak And Blu,” the neo-soul crooning of “Things Are Changing,” to the loud, low-down, gnarly stomp of “Numb.” This live disc traverses a wide spectrum of black music bound by the divine guitar influence of Collins and B.B. King.
You’d be hard pressed to find a more scintillating live disc this year.
This article originally appeared in VG‘s January ’15 issue. All copyrights are by the author and Vintage Guitar magazine. Unauthorized replication or use is strictly prohibited.
Mr. Big has withstood multi-platinum successes, personnel changes, and volatile disputes. Despite the band’s ups and downs, the original line-up remains intact. Paul Gilbert, Billy Sheehan, Eric Martin, and Pat Torpey stay frosty working in a plethora of outside musical endeavors. 2011’s What If was a hard-charging record, but here on their eighth studio album, the band once again displays the chemistry that has made them a top touring and recording act.
Produced by Pat Regan, the album dials it back with a combination of philosophical insights about life, relationships, and Gilbert’s predilection for early ’70s blues-rock. As one of the most underrated singers in rock, Martin croons with blue-eyed-soul perfection alongside ear-friendly compositions that borrow but never steal. Highlights include “The Monster In Me,” “Satisfied,” and “Fragile.”
The track list shuffles pristine acoustic ballads, mid-tempo rockers, and high-velocity quasi-metal. Gilbert and Sheehan continue to display powers far beyond those of mortal men, but use their gifts for good instead of evil. Always tuneful, Mr. Big has crafted a fine record to add to their legacy. When these guys get together, they produce superb product.
This article originally appeared in VG‘s February ’15 issue. All copyrights are by the author and Vintage Guitar magazine. Unauthorized replication or use is strictly prohibited.
Xotic Effects XW-1 wah was inspired by the late-’60s Clyde McCoy wah built in Italy. Designed to captures that pedal’s tone, it has controls for Bias, Wah Q, Treble, and Bass EQ, and is built with self-lubricating nylon bushings, gold contact relay with true-bypass switching, a low-battery alert, and Wah Resonance Frequency DIP switches. Learn more at xotic.us/effects/.
There has been a sea change in the music industry over the past several years. Recording has become more of a do-it-yourself component of the creative process, and less an end achieved in a professional studio. This shift has, on one hand (and rather sadly), signaled the demise of the studio industry, putting several legendary recording facilities out of business; on the other, it has put more creative power in the hands of the musicians, where many would agree it belongs.
Whereas previously even top artists were likely to have only “demo” or “project” studios at best, the amateur or beginner can now easily operate a home studio capable of turning out broadcast-ready master recordings on par with much of what we hear on the radio. But, owning the gear is barely the start of it – you still need the know-how to achieve professional-sounding recordings, and a lot of that still comes from time-tested techniques that professional engineers have developed over decades of crafting the art. Alongside these, however, the new breed of home recordist also needs to know what to do to get the job done, and that often means shortcuts, workarounds, and technical violations that would have been major no-nos for the old-school professional engineer.
In a new series, Vintage Guitar will equip its readers with the knowledge and skills necessary to achieve successful, professional-sounding home recordings. Since you, as a guitarist, are not only responsible for recording guitars, but often must play the role of engineer and producer to capture the rest of the band, as well, we will cover subjects like miking and recording drums, vocals, bass, keyboards, and other instruments, as well as mixing and mastering techniques, in addition to several methods for recording great acoustic and a electric guitar tracks.
To kick it off, this month, we guide you through the basics of setting up your own home studio, a starting point that applies to everyone entering the brave new world of self-recording.
What could be any player’s project room – while not a professional studio, it has everything needed to capture great recordings, and all within easy reach.
SetUp
The term “home studio” covers many and varying configurations, and there isn’t one right way to set one up, but certain “standards,” if you will, apply to the majority of them.
As with many ventures, this one necessarily starts with a question: What do I need to get a functional studio going? The answer depends on your intent. The equipment in a home studio can be as sparse as the bare minimum of ingredients necessary to plug in and record a voice or an instrument, or can be expanded exponentially to include the wherewithal to simultaneously track a full band. Even the most basic setup, it’s worth saying, can be used to make “professional” recordings if you use it right, so it’s worth emphasizing from the start that technique matters more than gear – and we’ll cover technique extensively in subsequent installments – as long as you have at least the basic minimum equipment required to record music.
If you are working purely with digital virtual and/or MIDI instruments, and recording only instrumental compositions, you can survive on the bare minimum and keep your recording truly “inside the box” (a phrase usually used to describe a recording process during which no audio signal ever leaves the computer after it has been recorded, until you burn it to a CD or share it as a digital file). But this is a guitar magazine, so we’ll assume you’ll occasionally want to record at least some external “live” sound source, and will need, at a minimum, a microphone and related accessories with which to do so.
So, the simple answer to our initial question is this: one computer loaded with digital audio workstation (DAW) software, one hardware interface or mic/instrument preamp (“mic pre” for short), speakers or headphones on which to monitor sound, one microphone, one mic cable, one mic stand. That’s it, and that is really what’s at the heart of this series: if you have just invested in your starter bundle of recording gear, great – get to work! If you really need a bigger setup to achieve your ends, though, such as enough mics and to record a full drum kit with at least a guitar, bass, and vocal recorded alongside as “guides,” you will need to invest more time and money, and the sky really is the limit. Even so, it’s just more – and perhaps better – of the same thing, so the basic “What will I need?” question still applies, but in multiples (be aware, though, drum tracks on several major hits have been recorded with a single mic, and we’ll show you how to do that, too, later in the series).
ProTools, like many other popular DAWs, creates a virtual studio on your computer, with recording, automated mixing, editing, processors, and countless other facilities.
Basic Components
Most home studios consist of these basic “work station” ingredients, in some form or other. These are the hardware and software components that work together to form the recording system that formerly comprised a tape deck, a mixer, and a selection of outboard processors in the good old days of analog recording. They will be referred to throughout this series, so it’s worth laying down some basic definitions at the outset.
Computer
This is whatever system you work on – PC, Mac, desktop, laptop, or tablet. System and software requirements often differ, and we won’t usually specify because the variables are too extensive.
Audio Interface
An audio interface (“interface” for short) is the piece of hardware that translates analog audio signals from a microphone or a line-in from an electronic instrument into digital signals that your computer and DAW can work with, which it feeds to them via a USB or FireWire port. They invariably include a set of analog-to-digital and digital-to-analog (AD/DA) converters, and often have mic and/or instrument preamps with level controls so you can plug mics or instruments directly into them without need of further external preamp units. Basic, entry-level, small-box interfaces might have two channels (that is, two inputs with preamps, and two sets of AD/DA converters), while mid-level units might have eight analog inputs (with preamps on a pair or more of them), plus other digital inputs that can be used simultaneously. Rather conversely, high-end interfaces often have no onboard preamps, because they are intended for use in better-equipped studios that are likely to use superior external mic pres anyway.
Digital Audio Workstation
Called a “DAW” for short, this is the software that provides the “virtual studio” in which you work. It allows the interaction of your hardware interface and your computer’s hard drive, gives you essential tools such as an on-screen mixer window, editing window, and virtual processors for mixing and treating your recorded audio tracks. In short, the DAW provides everything needed to go from audio input to finished product – it is the gateway for sound coming into and going out of your computer. Some basic DAWs, such as Apple’s popular Garage Band, can work directly with your computer’s sound card, eliminating the need for a separate interface. Popular DAWs include ProTools, Digital Performer, Logic, Cubase, and several others, and many major makers offer renditions of their systems at varying cost and skill levels. Many audio interfaces (at least those offered by makers which are also software developers) will include a basic DAW with their hardware, which is often good enough to get you rolling until you know what you want from a more advanced system.
Hard-disk Recorders/Workstations
Several units still exist – at the time of writing, at least – that take the place of the old analog cassette-based “portastudio,” and might be used instead of the computer/DAW/interface combination. These usually incorporate some form of internal hard-disk-based multi-track recorder, with a multi-channel mixer that includes mic preamps for audio input as well as facilities for mix down of recorded tracks, along with onboard digital effects and processors. These workstations can offer a lot of features in one place for a reasonable price, and might be a good alternative for a recordist who can’t invest in a good computer around which to base a home studio. The flipside is that they will often pose limitations when compared to a computer-based recording system, which is inherently more expandable.
Microphones, Outboard, and Hardware
If you mainly plan to record your own guitar and vocals to backing tracks assembled from samples or MIDI-triggered instruments, you can probably get by with one decent microphone run through the XLR input and mic preamp on your interface. If you want to record anything from acoustic guitar or piano in stereo, multi-amped electric guitar, or full drum kits, you will clearly need more mics, and your interface will need two or more preamp channels to accommodate them – or, to further increase the quality of your recordings, you might consider adding an outboard mic preamp to the gear list. A push toward professional multi-track studio capabilities will find you bringing on other outboard gear too, such as compressors, possibly an EQ, maybe a good old-fashioned multi-channel mixing desk to handle your routing, and so on.
Most home studios will require different types of microphones to get the job done properly. Here are a Beyer-Dynamic M201 dynamic mic (left) and M160 ribbon mic.
Microphones
The proliferation of Asian-made microphones designed and manufactured along the lines of many classic European and American professional mics makes this a golden age for the budget recordist. While these might not equal the expensive originals, they are often pretty impressive for the money, and can yield great results when used right. Do your research, read the reviews, and you can put together a decent collection of mics suited to a range of applications for the price of a single high-quality studio mic of yore.
In the next installment of this series, we’ll cover the three major types of microphones – dynamic, condenser, ribbon – and their uses, many of which will naturally cross over. A selection of something from each category (and a matched pair of condenser or ribbon mics if you intend to make true stereo recordings of any instrument) will usually do a small home studio proud, but if you really only need one mic to get your work done, you’ll need to put some thought into what you need from it. In brief, consider the dynamic mic sturdier, the condenser mic more sensitive and more high-fidelity, and the ribbon mic, well, fatter and more “vintage” sounding, perhaps (if delicate to handle), but those are just ballpark characteristics.
Microphone Preamps
A microphone preamp is anything that takes the low-level signal input directly from a microphone and ramps it up to a line-level signal, adding an amount of gain according to where you set the Gain or Level knob. This can be done by a mixer and/or any interface with built-in mic pres, though better quality is derived from stand-alone units that specialize in this function. We use these units to get one or more channels of audio input of a higher quality than the preamps in our interface; or, if tracking several mic inputs simultaneously, we might need a multi-channel mic pre (which could also be a decent mixing desk) to send line-level inputs to a multi-channel interface without its own multiple onboard mic preamps (“tracking” is the term for recording individual instrument or vocal tracks as part of the overall process of “recording,” although you can also “track” multiple instruments – or multiple mics on the same amp or instrument – simultaneously).
A couple channels each of decent external mic pre and compressor will do wonders for one’s tracking capabilities, and the sound quality of the final results.
The most basic mic pre might have nothing more than a knob that you turn to add a certain number of decibels (dBs) of gain, as required to input a signal of an appropriate level into your interface, and thereby your DAW. Most stand-alone mic pres will also include a few, or several, extra features, such as a phase-reverse switch, a low-frequency shelving switch to cut the response below a certain frequency, a pad to cut the overall input level of particularly hot mics or loud instruments, a source for phantom power to run condenser mics, and possibly more. In terms of connectibility, any useful pre really needs a low-impedence (a.k.a. low-Z) XLR mic input (some also have a high-Z 1/4″ input to connect other instruments or use as a DI), and balanced line-level outputs on XLR and/or 1/4″ stereo TRS jacks, or possibly both of these, including perhaps an unbalanced 1/4″ option.
Usable mic pres are more affordable than ever, though the cheapest aren’t likely to sound better than one included in basic interface. But there are plenty of decent stand-alones that provide good service, decent sound, and useful features at a reasonable price. Read the reviews, shop thoroughly and carefully, and discern what might work for your studio.
Compressors, EQs, and Outboard Effects
Many instruments recording in professional studios are done so with mics run through compression and EQ during the tracking process. These days, it’s a breeze to apply such processing after the fact, “in the box,” as an early part of the mixing process, although the more advanced your home studio, the more likely you’ll want to own at least an outboard compressor to record certain things through, and a decent outboard EQ, too. In the real world, engineers often apply several layers of compression to some tracks, recording them through a compressor patched between the mic pre and the recording deck (hard drive, tape, whatever), then treating them with further compression in a drum or guitar group, or in the mix as a whole. Using the compression and EQ software plug-ins included with most DAWs, you can usually work around these in a basic studio setup, so outboard units aren’t a priority from the outset (a “plug-in” is processing software loaded to individual tracks in your DAW’s virtual mixer, providing compression, EQ, myriad effects and even virtual instruments on individual tracks, or on your mix as a whole).
Fans of vintage analog recording might also like some analog outboard effects for authentic flavor: a spring reverb unit, tape echo, or what have you. You’re even less likely to track through these since recording through an effect ties you immediately to that sound, but if you use an outboard mixer or have an interface with auxiliary send/return capabilities, you might bring your mixes out of the box and run certain instruments or groups through analog effects for a retro flavor. Otherwise, and for the resolutely “in the box” recordist, such effects can generally be put off until future expansion demands.
Miscellaneous Hardware
Mic stands, mic clips, and/or shock mounts, pop screens, speaker stands… these aren’t the sexiest components of your studio, but need consideration nonetheless. Ask any aspiring recordist who has made do with inferior, malfunctioning, or cobbled-together hardware until frustration drove him or her to take the plunge on the good stuff and they will tell you the investment is worth making now, rather than later. Consider what you need at-hand to get the job done, investigate what’s available, and plan your studio budget.
Bass traps in at least a couple of corners are almost always essential for well-balanced recordings.
A Room Of One’s Own
In addition to the gear, you also need a room in which to work, and the way you set that up can often be as much a factor in your success as a recordist (or lack thereof) as the gear you put in it. In her 1929 essay that carried this title, Virginia Woolf famously declared the need for “a room of one’s own,” in an age when women were unlikely to have a private space in which to gestate creative thought. These days we’re more likely to say “you need your own space,” but the same principle applies to recordists today as it did to would-be female writers of the early 20th century. This space might, of necessity, be a shared family or communal space, and if that can’t be helped then that’s just the way it is. Even so, you will – with your cohabiters’ permission – want to make it “your own” as much as possible in order to get it working for you as a recording venue. Whether large or small, the room that will henceforth be known as “your studio” will need to fulfill certain requirements.
First among these is the ability to have at least the core essentials of your recording system permanently set up. That means a desk or table on which your computer or laptop (or other recording workstation) sits, monitor speakers correctly set up either side of it, any mic/instrument preamp or recording interface within reach to the right or left of your computer keyboard (or mixer), and your mic and its stand and cable easily accessible. And, of course, you also want whatever instrument(s) are your main stock in trade to be readily to hand, too. Insist on this kind of accessibility, and you are making it easy to get something done in whatever spare time your life affords.
Aside from this priority, the three main requirements from this room have to do with sound. Namely, that the space works to:
• Keep internal sound in.
• Keep unwanted external sound out.
• Allow music produced or monitored within to sound as natural as possible.
Basic absorptive-foam room treatments won’t keep sound from escaping (and possibly annoying the neighbors), but it will help to tame an overly lively room.
In truth, the first two are virtually impossible to achieve in any total sense in the home studio. That doesn’t mean you can’t track full live bands or produced broadcast-quality recordings – you certainly can. You just have to work with certain realities.
Real soundproofing involves a lot of construction and expense, rather than simply putting foamy stuff or egg cartons on the inside of an existing room. Considerable noise retention requires layers of solid material, ideally with insulation in between – essentially building a room within a room – and you have to seal gaps, cracks, joints, and fissures between walls and floors as well as ceilings, windows, and doors. The geometric foam used in squares on walls and wedges in the corners is for sound absorption, and isn’t soundproofing in the least. It’s important, and most home studios benefit from it, but it won’t contain sound within any room.
Research correct applications of sound-absorbing room treatments – it’s certainly worth the effort. A totally “dead” room can often sound dull and boxy, but you’ll want to deaden prominent reflections, notable frequency “honks,” or exaggerated bass in order to capture the realistic and reproducible sound of the instruments you are recording. Even heavy curtains, thick quilts and blankets, and furniture padding can work to this end. Since few of us can budget for a room that enhances the sound of any music performed within it, the usual aim for a home studio is aural neutrality. Get even close to that, and you have a room you can work with.
Desk Positioning
In addition to a neutral room, the position of your mixing station and placement of monitors will have a major affect on accurate perception of recorded sound while seated at your workstation. If your room is extremely small, your options for positioning might be fairly limited. The basic rules to follow here, as far as possible, are to:
• Position your monitor speakers some distance from the wall behind them
• Position your work station as symmetrically as possible within the room, or the portion of the room you are working in
• Place your seat at a symmetrical position between and in front of the speakers.
If you get all of these “as right as possible” within the parameters you have to work with, you’ll achieve two important functions in your listening environment – minimizing reflections of monitored sound and creating an accurate stereo field.
If you are working in an extremely small room and can’t achieve one or either of these objectives, you can partly overcome the handicap by adding more sound absorption to the walls and corners behind the monitors, and to those behind/to the side, if reflected sound is likely to bounce back from behind you and skew your perceptions of frequency and the stereo spectrum. In a medium-sized room, however, one that still allows you to place speakers in an optimum position (at a distance from the wall behind them that’s about half the distance from the front of the speakers to the wall behind you), you don’t usually need to totally deaden things, and ideally you do not want to do so. Also, avoid placing monitors in corners at the end of a narrow room (in any room, really), as this will accentuate bass frequencies, and make it impossible to know how the low end in your mix actually sounds in the average listening environment. The control room in a professional studio isn’t usually an enormous space, and isn’t swaddled in absorption foam. Retaining a certain amount of liveliness in the listening room yields a more natural feel, and will give better results provided there are no conflicting or misleading room tones or reflections.
Set up your available gear and available space following these guidelines as closely as possible, and you’ll be ready to get to work. Future installments will discuss techniques to help you do so.
Digital Recording Basics
The user’s manuals included with any interface or DAW should offer some tips on the basics of digital recording, but it’s worth covering a few essential terms and reference points here. As compared with old analog tape recording, digital systems will do a lot of the technical work for you, but you do need to understand a little something about digital “resolution” and digital distortion in order to get the most out of recording with these new wonders.
(LEFT) Maxing out the meters in the DAW indicates digital distortion in the track; this is a bad thing. (RIGHT) Most DAWs will present a setup window where you can select the bit depth and sample rate you want to work in.
Resolution
Thanks to the proliferation of digital cameras and HD TV, most of us are familiar with the concept of “resolution” as it applies to visual media. Just as the higher the number of elements composing your picture means a better picture quality, increased audio quality is defined by increasing bit rates (also “bit depth”) and sample frequencies (also “sample rates”). “Bit rate” determines the number of decimals in each sample of audio taken in the recording process, and “sample frequency” determines the rate at which samples are taken (as a per-second figure).
The standard for CDs is 16 bits at 44.1kHz, which means a 16-decimal sample is taken 44,100 times per second. Today, the ability of good digital recording equipment to work to higher rates of both parameters means that most projects are recorded at bit rates of 24, with sample frequencies of 48kHz, 88.2kHz, 96kHz, or even 192kHz, and the result is converted down to 16/44.1 in the mastering process. Higher bit and sample rates require more processing speed and more memory, though, and recordists using fairly basic starter systems might not want to go to unnecessary extremes for this reason. With audio recorded with the intention of CD-quality release at best, 24-bit/48kHz is a good basic standard, with the second figure upped to 88.2kHz or 96kHz if you seek even better fidelity.
Why record at higher settings if the end listener won’t hear it? Well, in some ways they will. Even though the CD is limited to 16/44.1kHz (and MP3 conversion compresses it down further), the processing used when applying software plug-ins (for reverb, delay, compression, and so on) will usually sound better when working at higher bit depths and sample rates. Also, perhaps you will some day want to release the results on a format with higher resolution capabilities – who knows what the future will bring? – and will be glad you captured the best-sounding recordings possible from the start.
Digital Distortion
With analog recording – and analog sound reproduction, in general – we sometimes value some of the distortion characteristics: a little tube distortion or tape compression, for example, can contribute to fatter or warmer sounding instruments. Digital distortion, on the other hand, is never desirable in the recording process, and sounds entirely nasty when it does occur. No soft, warm, fuzzy blurring of the audio along the lines of gentle tube clipping, digital clipping is a harsh kkktchhhkkk that sounds like the overload it is, and indicates “technical failure” in a recording. For that reason, you will want to do your best to avoid digital clipping throughout the recording process. This is not to say that you can’t record, for example, a distorted electric guitar amp into a digital system, or even a distortion digital instrument for the sake of that sound as a creative element, but that you want to avoid letting the signal from the mic or DI’d instrument distort at the point of input into your interface, computer, or DAW. Once digital clipping occurs in the recording process, you can’t do anything to clean it up, and are really stuck with it unless you edit that segment out, or re-record it.
To keep all digital signals safely distortion-free, be very sure that your interface or DAW meters (both, in fact!) stay well short of the red overload zone at all times. Coordinate any gain controls on external preamps and the interface’s input levels to present a clean, safe level to the analog-to-digital converter, and keep already recorded tracks well below the red zone in the DAW when mixing. Recordists who worked in the analog realm in the good old days might recall the advice that you sometimes push levels recorded to tape so that they are just touching on the meters’ overload zone, in order to get the best signal-to-noise ratio. The inherently low noise of digital recording means that that standard no longer applies, and you should in fact do something close to the opposite: keep recording levels well down into the safe zone – not even high in the yellow warning zone – and you can always bump up the volume later without increasing your background noise.
When mixing several recorded tracks together, even just to monitor existing tracks while overdubbing new instruments, you also need to rein in signal levels to avoid digital clipping in the DAW. If you need more volume, but pushing up the individual faders is putting you in the red, try pulling down individual tracks, then pushing up the master just short of the red, and if you still need more volume in the monitors, turn up the monitoring system.
In addition to being Vintage Guitar’s resident amp historian, Dave Hunter is the author of several books on gear and technique, including The Home Recording Handbook (Backbeat Books, 2012), which covers in further detail many of the techniques discussed in this series.
This article originally appeared in VG July 2014 issue. All copyrights are by the author and Vintage Guitar magazine. Unauthorized replication or use is strictly prohibited.
Crimsontone Amps is set to introduce a line of compact effects pedals. The Nero Overdrive is an LM741-opamp-based hybrid of the ’70s “script logo” MXR Distortion+ and a Microamp. The Rosso Fuzz has a three-stage silicon transistor circuit with soft diode clipping. The Tono Shaper has a two-band Baxandall-style tone stack circuit with boost, and the Luna Boost is a single-stage boost with Gain knob. Learn more at www.crimsontone.com.
Taurus Amplification’s stomp-box shaped Stomp-Head 2 Classic produces 60 watts output based on the company’s Master Tube Design (MTD) technology. It weighs less than four pounds, has Clean and Lead channels with a Crunch voicing, a built-in attenuator to drop output to 25 watts, effects loop, Line output with speaker simulation, and an input for external channel selector. It measures 80 x 290 x 190 mm. Learn more at www.taurus-amp.pl.


 The members of Lionize blend heavy rock with reggae to create infectious tunes… kind of like if the guys in Deep Purple were Rastafarians wrapped in trippy sci-fi imagery. Nate Bergman is the SG-wielding architect of the group, and recently shared the strategy on the band’s latest album.


 Xotic Effects XW-1 wah was inspired by the late-’60s Clyde McCoy wah built in Italy. Designed to captures that pedal’s tone, it has controls for Bias, Wah Q, Treble, and Bass EQ, and is built with self-lubricating nylon bushings, gold contact relay with true-bypass switching, a low-battery alert, and Wah Resonance Frequency DIP switches. Learn more at xotic.us/effects/.


 Crimsontone Amps is set to introduce a line of compact effects pedals. The Nero Overdrive is an LM741-opamp-based hybrid of the ’70s “script logo” MXR Distortion+ and a Microamp. The Rosso Fuzz has a three-stage silicon transistor circuit with soft diode clipping. The Tono Shaper has a two-band Baxandall-style tone stack circuit with boost, and the Luna Boost is a single-stage boost with Gain knob. Learn more at
  Taurus Amplification’s stomp-box shaped Stomp-Head 2 Classic produces 60 watts output based on the company’s Master Tube Design (MTD) technology. It weighs less than four pounds, has Clean and Lead channels with a Crunch voicing, a built-in attenuator to drop output to 25 watts, effects loop, Line output with speaker simulation, and an input for external channel selector. It measures 80 x 290 x 190 mm. Learn more at www.taurus-amp.pl.