Simmonds onstage with his Zion guitar at the Windsor Blues Festival. Kim Simmonds: Arnie Goodman.Under the aegis of founder Kim Simmonds, Savoy Brown has always been a band “subject to change.” Formed in 1965, some of its incarnations went on musical tangents, but the blues has been its keystone genre.
The band’s most recent album, Goin’ to the Delta, is a return to basic electric blues, with Simmonds reassuming lead vocals in a guitar/bass/drums format. Pat DeSalvo plays bass, while Garnet Grimm plays drums.
“There’s so much involved – personal feelings, [the] actions of those around you, and ‘the muse,’” Simmonds said of the band’s “go with what you know” approach. “All I know is that the new album has resonated with people.”
Simmonds has also garnered recent praise for a solo acoustic blues project that built his confidence as a vocalist. Accordingly, the new album is credited to “Kim Simmonds and Savoy Brown.”
“I felt I was making a statement, and putting my name in front emphasized that point,” he said. “The marquee name has changed over the years; ‘The Savoy Brown Blues Band’ was how it first appeared, and it has changed here and there in an attempt to keep things fresh – simply ‘Savoy Brown’ or ‘Savoy Brown featuring Kim Simmonds’ etc.”
Its songs were penned by Simmonds, who noted influences including “…Albert Collins on ‘Backstreet Woman,’ Lonnie Johnson on ‘Just A Dream,’ and B.B.King, plus Chicago musicians like John Primer and Magic Slim.”
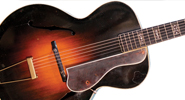
He has been through numerous guitars over the decades, and another facet of the full-circle approach on Goin’ to the Delta is the Zion guitar shown on the cover; he has used the instrument for more than 20 years.
“I used it on all tracks except the slide songs,” Simmonds averred. “It has a hard, generic, non-colored sound that was perfect. Plus, it’s a guitar few people in the blues world use, so I knew it would be a different sound to listeners’ ears. I primarily used the middle pickup to get a less-colored sound – bright, but without the treble pickup. I was looking for a guitar tone that wasn’t immediately identifiable.”
For slide, he relied on a DBZ guitar. DeSalvo, meanwhile, holds down the low-end with a G&L Climax Bass.
“He plays an important role, musically, and manages me on the road!” Simmonds said. “Pat has come into his own these past few years. He’s classically trained, yet able to rock out. I’m not sure why the trio works so well with Pat and Garnet; it’s probably simple chemistry.”
The approach to recording the album was also basic, and any rhythm guitar parts were utilitarian, though the instrumental “Cobra” has a rhythm part that’s more up-front in the mix.
“There is rhythm guitar on most of the tracks, but I deliberately didn’t play counterpoint, so the overdub is simply part of the drums and bass. That’s how I conceived the songs and production.”
The mix on “When You’ve Got A Good Thing” is different, as well, and includes a light reverb.
“The nature of the song demanded a slightly different approach,” Simmonds said. “The album was recorded quickly, with me playing and singing live. We wanted spontaneity.”
Asked about favorite songs, he lists “Laura Lee,” “Sad News,” and “Nuthin’ Like The Blues.”
In concert, he relies on a Heritage guitar and the DBZ for slide. Simmonds also has the future mapped out for his ongoing musical efforts.
“My next release will be an acoustic album of instrumentals called Jazzin’ on the Blues,” he said. “I’ll tour Europe and the U.S., and this summer, I’ll tour with Johnny and Edgar Winter, and in 2015, do the Rock Legends Cruise.”
Simmonds faces the future with a positive attitude.
“This is how life should be – the older you get, the better you get. After all, age teaches you!”
This article originally appeared in VG July 2014 issue. All copyrights are by the author and Vintage Guitar magazine. Unauthorized replication or use is strictly prohibited.
There has been a sea change in the music industry over the past several years. Recording has become more of a do-it-yourself component of the creative process, and less an end achieved in a professional studio. This shift has, on one hand (and rather sadly), signaled the demise of the studio industry, putting several legendary recording facilities out of business; on the other, it has put more creative power in the hands of the musicians, where many would agree it belongs.
Whereas previously even top artists were likely to have only “demo” or “project” studios at best, the amateur or beginner can now easily operate a home studio capable of turning out broadcast-ready master recordings on par with much of what we hear on the radio. But, owning the gear is barely the start of it – you still need the know-how to achieve professional-sounding recordings, and a lot of that still comes from time-tested techniques that professional engineers have developed over decades of crafting the art. Alongside these, however, the new breed of home recordist also needs to know what to do to get the job done, and that often means shortcuts, workarounds, and technical violations that would have been major no-nos for the old-school professional engineer.
In a new series, Vintage Guitar will equip its readers with the knowledge and skills necessary to achieve successful, professional-sounding home recordings. Since you, as a guitarist, are not only responsible for recording guitars, but often must play the role of engineer and producer to capture the rest of the band, as well, we will cover subjects like miking and recording drums, vocals, bass, keyboards, and other instruments, as well as mixing and mastering techniques, in addition to several methods for recording great acoustic and a electric guitar tracks.
To kick it off, this month, we guide you through the basics of setting up your own home studio, a starting point that applies to everyone entering the brave new world of self-recording.
What could be any player’s project room – while not a professional studio, it has everything needed to capture great recordings, and all within easy reach.
SetUp
The term “home studio” covers many and varying configurations, and there isn’t one right way to set one up, but certain “standards,” if you will, apply to the majority of them.
As with many ventures, this one necessarily starts with a question: What do I need to get a functional studio going? The answer depends on your intent. The equipment in a home studio can be as sparse as the bare minimum of ingredients necessary to plug in and record a voice or an instrument, or can be expanded exponentially to include the wherewithal to simultaneously track a full band. Even the most basic setup, it’s worth saying, can be used to make “professional” recordings if you use it right, so it’s worth emphasizing from the start that technique matters more than gear – and we’ll cover technique extensively in subsequent installments – as long as you have at least the basic minimum equipment required to record music.
If you are working purely with digital virtual and/or MIDI instruments, and recording only instrumental compositions, you can survive on the bare minimum and keep your recording truly “inside the box” (a phrase usually used to describe a recording process during which no audio signal ever leaves the computer after it has been recorded, until you burn it to a CD or share it as a digital file). But this is a guitar magazine, so we’ll assume you’ll occasionally want to record at least some external “live” sound source, and will need, at a minimum, a microphone and related accessories with which to do so.
So, the simple answer to our initial question is this: one computer loaded with digital audio workstation (DAW) software, one hardware interface or mic/instrument preamp (“mic pre” for short), speakers or headphones on which to monitor sound, one microphone, one mic cable, one mic stand. That’s it, and that is really what’s at the heart of this series: if you have just invested in your starter bundle of recording gear, great – get to work! If you really need a bigger setup to achieve your ends, though, such as enough mics and to record a full drum kit with at least a guitar, bass, and vocal recorded alongside as “guides,” you will need to invest more time and money, and the sky really is the limit. Even so, it’s just more – and perhaps better – of the same thing, so the basic “What will I need?” question still applies, but in multiples (be aware, though, drum tracks on several major hits have been recorded with a single mic, and we’ll show you how to do that, too, later in the series).
ProTools, like many other popular DAWs, creates a virtual studio on your computer, with recording, automated mixing, editing, processors, and countless other facilities.
Basic Components
Most home studios consist of these basic “work station” ingredients, in some form or other. These are the hardware and software components that work together to form the recording system that formerly comprised a tape deck, a mixer, and a selection of outboard processors in the good old days of analog recording. They will be referred to throughout this series, so it’s worth laying down some basic definitions at the outset.
Computer
This is whatever system you work on – PC, Mac, desktop, laptop, or tablet. System and software requirements often differ, and we won’t usually specify because the variables are too extensive.
Audio Interface
An audio interface (“interface” for short) is the piece of hardware that translates analog audio signals from a microphone or a line-in from an electronic instrument into digital signals that your computer and DAW can work with, which it feeds to them via a USB or FireWire port. They invariably include a set of analog-to-digital and digital-to-analog (AD/DA) converters, and often have mic and/or instrument preamps with level controls so you can plug mics or instruments directly into them without need of further external preamp units. Basic, entry-level, small-box interfaces might have two channels (that is, two inputs with preamps, and two sets of AD/DA converters), while mid-level units might have eight analog inputs (with preamps on a pair or more of them), plus other digital inputs that can be used simultaneously. Rather conversely, high-end interfaces often have no onboard preamps, because they are intended for use in better-equipped studios that are likely to use superior external mic pres anyway.
Digital Audio Workstation
Called a “DAW” for short, this is the software that provides the “virtual studio” in which you work. It allows the interaction of your hardware interface and your computer’s hard drive, gives you essential tools such as an on-screen mixer window, editing window, and virtual processors for mixing and treating your recorded audio tracks. In short, the DAW provides everything needed to go from audio input to finished product – it is the gateway for sound coming into and going out of your computer. Some basic DAWs, such as Apple’s popular Garage Band, can work directly with your computer’s sound card, eliminating the need for a separate interface. Popular DAWs include ProTools, Digital Performer, Logic, Cubase, and several others, and many major makers offer renditions of their systems at varying cost and skill levels. Many audio interfaces (at least those offered by makers which are also software developers) will include a basic DAW with their hardware, which is often good enough to get you rolling until you know what you want from a more advanced system.
Hard-disk Recorders/Workstations
Several units still exist – at the time of writing, at least – that take the place of the old analog cassette-based “portastudio,” and might be used instead of the computer/DAW/interface combination. These usually incorporate some form of internal hard-disk-based multi-track recorder, with a multi-channel mixer that includes mic preamps for audio input as well as facilities for mix down of recorded tracks, along with onboard digital effects and processors. These workstations can offer a lot of features in one place for a reasonable price, and might be a good alternative for a recordist who can’t invest in a good computer around which to base a home studio. The flipside is that they will often pose limitations when compared to a computer-based recording system, which is inherently more expandable.
Microphones, Outboard, and Hardware
If you mainly plan to record your own guitar and vocals to backing tracks assembled from samples or MIDI-triggered instruments, you can probably get by with one decent microphone run through the XLR input and mic preamp on your interface. If you want to record anything from acoustic guitar or piano in stereo, multi-amped electric guitar, or full drum kits, you will clearly need more mics, and your interface will need two or more preamp channels to accommodate them – or, to further increase the quality of your recordings, you might consider adding an outboard mic preamp to the gear list. A push toward professional multi-track studio capabilities will find you bringing on other outboard gear too, such as compressors, possibly an EQ, maybe a good old-fashioned multi-channel mixing desk to handle your routing, and so on.
Most home studios will require different types of microphones to get the job done properly. Here are a Beyer-Dynamic M201 dynamic mic (left) and M160 ribbon mic.
Microphones
The proliferation of Asian-made microphones designed and manufactured along the lines of many classic European and American professional mics makes this a golden age for the budget recordist. While these might not equal the expensive originals, they are often pretty impressive for the money, and can yield great results when used right. Do your research, read the reviews, and you can put together a decent collection of mics suited to a range of applications for the price of a single high-quality studio mic of yore.
In the next installment of this series, we’ll cover the three major types of microphones – dynamic, condenser, ribbon – and their uses, many of which will naturally cross over. A selection of something from each category (and a matched pair of condenser or ribbon mics if you intend to make true stereo recordings of any instrument) will usually do a small home studio proud, but if you really only need one mic to get your work done, you’ll need to put some thought into what you need from it. In brief, consider the dynamic mic sturdier, the condenser mic more sensitive and more high-fidelity, and the ribbon mic, well, fatter and more “vintage” sounding, perhaps (if delicate to handle), but those are just ballpark characteristics.
Microphone Preamps
A microphone preamp is anything that takes the low-level signal input directly from a microphone and ramps it up to a line-level signal, adding an amount of gain according to where you set the Gain or Level knob. This can be done by a mixer and/or any interface with built-in mic pres, though better quality is derived from stand-alone units that specialize in this function. We use these units to get one or more channels of audio input of a higher quality than the preamps in our interface; or, if tracking several mic inputs simultaneously, we might need a multi-channel mic pre (which could also be a decent mixing desk) to send line-level inputs to a multi-channel interface without its own multiple onboard mic preamps (“tracking” is the term for recording individual instrument or vocal tracks as part of the overall process of “recording,” although you can also “track” multiple instruments – or multiple mics on the same amp or instrument – simultaneously).
A couple channels each of decent external mic pre and compressor will do wonders for one’s tracking capabilities, and the sound quality of the final results.
The most basic mic pre might have nothing more than a knob that you turn to add a certain number of decibels (dBs) of gain, as required to input a signal of an appropriate level into your interface, and thereby your DAW. Most stand-alone mic pres will also include a few, or several, extra features, such as a phase-reverse switch, a low-frequency shelving switch to cut the response below a certain frequency, a pad to cut the overall input level of particularly hot mics or loud instruments, a source for phantom power to run condenser mics, and possibly more. In terms of connectibility, any useful pre really needs a low-impedence (a.k.a. low-Z) XLR mic input (some also have a high-Z 1/4″ input to connect other instruments or use as a DI), and balanced line-level outputs on XLR and/or 1/4″ stereo TRS jacks, or possibly both of these, including perhaps an unbalanced 1/4″ option.
Usable mic pres are more affordable than ever, though the cheapest aren’t likely to sound better than one included in basic interface. But there are plenty of decent stand-alones that provide good service, decent sound, and useful features at a reasonable price. Read the reviews, shop thoroughly and carefully, and discern what might work for your studio.
Compressors, EQs, and Outboard Effects
Many instruments recording in professional studios are done so with mics run through compression and EQ during the tracking process. These days, it’s a breeze to apply such processing after the fact, “in the box,” as an early part of the mixing process, although the more advanced your home studio, the more likely you’ll want to own at least an outboard compressor to record certain things through, and a decent outboard EQ, too. In the real world, engineers often apply several layers of compression to some tracks, recording them through a compressor patched between the mic pre and the recording deck (hard drive, tape, whatever), then treating them with further compression in a drum or guitar group, or in the mix as a whole. Using the compression and EQ software plug-ins included with most DAWs, you can usually work around these in a basic studio setup, so outboard units aren’t a priority from the outset (a “plug-in” is processing software loaded to individual tracks in your DAW’s virtual mixer, providing compression, EQ, myriad effects and even virtual instruments on individual tracks, or on your mix as a whole).
Fans of vintage analog recording might also like some analog outboard effects for authentic flavor: a spring reverb unit, tape echo, or what have you. You’re even less likely to track through these since recording through an effect ties you immediately to that sound, but if you use an outboard mixer or have an interface with auxiliary send/return capabilities, you might bring your mixes out of the box and run certain instruments or groups through analog effects for a retro flavor. Otherwise, and for the resolutely “in the box” recordist, such effects can generally be put off until future expansion demands.
Miscellaneous Hardware
Mic stands, mic clips, and/or shock mounts, pop screens, speaker stands… these aren’t the sexiest components of your studio, but need consideration nonetheless. Ask any aspiring recordist who has made do with inferior, malfunctioning, or cobbled-together hardware until frustration drove him or her to take the plunge on the good stuff and they will tell you the investment is worth making now, rather than later. Consider what you need at-hand to get the job done, investigate what’s available, and plan your studio budget.
Bass traps in at least a couple of corners are almost always essential for well-balanced recordings.
A Room Of One’s Own
In addition to the gear, you also need a room in which to work, and the way you set that up can often be as much a factor in your success as a recordist (or lack thereof) as the gear you put in it. In her 1929 essay that carried this title, Virginia Woolf famously declared the need for “a room of one’s own,” in an age when women were unlikely to have a private space in which to gestate creative thought. These days we’re more likely to say “you need your own space,” but the same principle applies to recordists today as it did to would-be female writers of the early 20th century. This space might, of necessity, be a shared family or communal space, and if that can’t be helped then that’s just the way it is. Even so, you will – with your cohabiters’ permission – want to make it “your own” as much as possible in order to get it working for you as a recording venue. Whether large or small, the room that will henceforth be known as “your studio” will need to fulfill certain requirements.
First among these is the ability to have at least the core essentials of your recording system permanently set up. That means a desk or table on which your computer or laptop (or other recording workstation) sits, monitor speakers correctly set up either side of it, any mic/instrument preamp or recording interface within reach to the right or left of your computer keyboard (or mixer), and your mic and its stand and cable easily accessible. And, of course, you also want whatever instrument(s) are your main stock in trade to be readily to hand, too. Insist on this kind of accessibility, and you are making it easy to get something done in whatever spare time your life affords.
Aside from this priority, the three main requirements from this room have to do with sound. Namely, that the space works to:
• Keep internal sound in.
• Keep unwanted external sound out.
• Allow music produced or monitored within to sound as natural as possible.
Basic absorptive-foam room treatments won’t keep sound from escaping (and possibly annoying the neighbors), but it will help to tame an overly lively room.
In truth, the first two are virtually impossible to achieve in any total sense in the home studio. That doesn’t mean you can’t track full live bands or produced broadcast-quality recordings – you certainly can. You just have to work with certain realities.
Real soundproofing involves a lot of construction and expense, rather than simply putting foamy stuff or egg cartons on the inside of an existing room. Considerable noise retention requires layers of solid material, ideally with insulation in between – essentially building a room within a room – and you have to seal gaps, cracks, joints, and fissures between walls and floors as well as ceilings, windows, and doors. The geometric foam used in squares on walls and wedges in the corners is for sound absorption, and isn’t soundproofing in the least. It’s important, and most home studios benefit from it, but it won’t contain sound within any room.
Research correct applications of sound-absorbing room treatments – it’s certainly worth the effort. A totally “dead” room can often sound dull and boxy, but you’ll want to deaden prominent reflections, notable frequency “honks,” or exaggerated bass in order to capture the realistic and reproducible sound of the instruments you are recording. Even heavy curtains, thick quilts and blankets, and furniture padding can work to this end. Since few of us can budget for a room that enhances the sound of any music performed within it, the usual aim for a home studio is aural neutrality. Get even close to that, and you have a room you can work with.
Desk Positioning
In addition to a neutral room, the position of your mixing station and placement of monitors will have a major affect on accurate perception of recorded sound while seated at your workstation. If your room is extremely small, your options for positioning might be fairly limited. The basic rules to follow here, as far as possible, are to:
• Position your monitor speakers some distance from the wall behind them
• Position your work station as symmetrically as possible within the room, or the portion of the room you are working in
• Place your seat at a symmetrical position between and in front of the speakers.
If you get all of these “as right as possible” within the parameters you have to work with, you’ll achieve two important functions in your listening environment – minimizing reflections of monitored sound and creating an accurate stereo field.
If you are working in an extremely small room and can’t achieve one or either of these objectives, you can partly overcome the handicap by adding more sound absorption to the walls and corners behind the monitors, and to those behind/to the side, if reflected sound is likely to bounce back from behind you and skew your perceptions of frequency and the stereo spectrum. In a medium-sized room, however, one that still allows you to place speakers in an optimum position (at a distance from the wall behind them that’s about half the distance from the front of the speakers to the wall behind you), you don’t usually need to totally deaden things, and ideally you do not want to do so. Also, avoid placing monitors in corners at the end of a narrow room (in any room, really), as this will accentuate bass frequencies, and make it impossible to know how the low end in your mix actually sounds in the average listening environment. The control room in a professional studio isn’t usually an enormous space, and isn’t swaddled in absorption foam. Retaining a certain amount of liveliness in the listening room yields a more natural feel, and will give better results provided there are no conflicting or misleading room tones or reflections.
Set up your available gear and available space following these guidelines as closely as possible, and you’ll be ready to get to work. Future installments will discuss techniques to help you do so.
Digital Recording Basics
The user’s manuals included with any interface or DAW should offer some tips on the basics of digital recording, but it’s worth covering a few essential terms and reference points here. As compared with old analog tape recording, digital systems will do a lot of the technical work for you, but you do need to understand a little something about digital “resolution” and digital distortion in order to get the most out of recording with these new wonders.
(LEFT) Maxing out the meters in the DAW indicates digital distortion in the track; this is a bad thing. (RIGHT) Most DAWs will present a setup window where you can select the bit depth and sample rate you want to work in.
Resolution
Thanks to the proliferation of digital cameras and HD TV, most of us are familiar with the concept of “resolution” as it applies to visual media. Just as the higher the number of elements composing your picture means a better picture quality, increased audio quality is defined by increasing bit rates (also “bit depth”) and sample frequencies (also “sample rates”). “Bit rate” determines the number of decimals in each sample of audio taken in the recording process, and “sample frequency” determines the rate at which samples are taken (as a per-second figure).
The standard for CDs is 16 bits at 44.1kHz, which means a 16-decimal sample is taken 44,100 times per second. Today, the ability of good digital recording equipment to work to higher rates of both parameters means that most projects are recorded at bit rates of 24, with sample frequencies of 48kHz, 88.2kHz, 96kHz, or even 192kHz, and the result is converted down to 16/44.1 in the mastering process. Higher bit and sample rates require more processing speed and more memory, though, and recordists using fairly basic starter systems might not want to go to unnecessary extremes for this reason. With audio recorded with the intention of CD-quality release at best, 24-bit/48kHz is a good basic standard, with the second figure upped to 88.2kHz or 96kHz if you seek even better fidelity.
Why record at higher settings if the end listener won’t hear it? Well, in some ways they will. Even though the CD is limited to 16/44.1kHz (and MP3 conversion compresses it down further), the processing used when applying software plug-ins (for reverb, delay, compression, and so on) will usually sound better when working at higher bit depths and sample rates. Also, perhaps you will some day want to release the results on a format with higher resolution capabilities – who knows what the future will bring? – and will be glad you captured the best-sounding recordings possible from the start.
Digital Distortion
With analog recording – and analog sound reproduction, in general – we sometimes value some of the distortion characteristics: a little tube distortion or tape compression, for example, can contribute to fatter or warmer sounding instruments. Digital distortion, on the other hand, is never desirable in the recording process, and sounds entirely nasty when it does occur. No soft, warm, fuzzy blurring of the audio along the lines of gentle tube clipping, digital clipping is a harsh kkktchhhkkk that sounds like the overload it is, and indicates “technical failure” in a recording. For that reason, you will want to do your best to avoid digital clipping throughout the recording process. This is not to say that you can’t record, for example, a distorted electric guitar amp into a digital system, or even a distortion digital instrument for the sake of that sound as a creative element, but that you want to avoid letting the signal from the mic or DI’d instrument distort at the point of input into your interface, computer, or DAW. Once digital clipping occurs in the recording process, you can’t do anything to clean it up, and are really stuck with it unless you edit that segment out, or re-record it.
To keep all digital signals safely distortion-free, be very sure that your interface or DAW meters (both, in fact!) stay well short of the red overload zone at all times. Coordinate any gain controls on external preamps and the interface’s input levels to present a clean, safe level to the analog-to-digital converter, and keep already recorded tracks well below the red zone in the DAW when mixing. Recordists who worked in the analog realm in the good old days might recall the advice that you sometimes push levels recorded to tape so that they are just touching on the meters’ overload zone, in order to get the best signal-to-noise ratio. The inherently low noise of digital recording means that that standard no longer applies, and you should in fact do something close to the opposite: keep recording levels well down into the safe zone – not even high in the yellow warning zone – and you can always bump up the volume later without increasing your background noise.
When mixing several recorded tracks together, even just to monitor existing tracks while overdubbing new instruments, you also need to rein in signal levels to avoid digital clipping in the DAW. If you need more volume, but pushing up the individual faders is putting you in the red, try pulling down individual tracks, then pushing up the master just short of the red, and if you still need more volume in the monitors, turn up the monitoring system.
In addition to being Vintage Guitar’s resident amp historian, Dave Hunter is the author of several books on gear and technique, including The Home Recording Handbook (Backbeat Books, 2012), which covers in further detail many of the techniques discussed in this series.
This article originally appeared in VG July 2014 issue. All copyrights are by the author and Vintage Guitar magazine. Unauthorized replication or use is strictly prohibited.
Though many collectors focus on instruments in fine original condition, every so often one emerges that, regardless of condition, is no less exciting than a paleontologist finding the “missing link.” Everything there is to know about the Gibson L-5 designed by Carl Kress can be learned from this example, with the model designation “Special” hand-written on the interior paper label, all of its original parts, and serial number 89849 (consistent with a manufacture date of 1933).
While one’s initial impression might be that this is a “floor sweep” model made by assembling whichever components were laying around due to wartime materials and labor shortages, the body is perfectly standard for a ’33 L-5 with a 16″-wide body (they went to the 17″ Advanced body size in 1935). Its neck specifications include features from other Gibson models: the fingerboard inlay is the same as an option on ’30s Style 3 Mastertone banjos and the Style 5 Deluxe Mastertone banjo; inlays are enclosed in rosewood rectangles with an ivoroid border like they were cut from a previously made fingerboard (it’s possible that leftover banjo fingerboards were used); the peghead inlay (which also has an ivoroid border around the center inlay) is the same used on the style 5 trap-door banjo circa 1924; the body, pickguard, bridge, and tailpiece are all perfectly consistent with 1933. And though the tuners are a style encountered on some wartime instruments, these are not typical of an instrument from ’33. However, the (wide and thick) neck and peghead dimensions, as well as the heel shape, are unlike any other Gibson instruments from ’33; the neck is standard only in that its outer parts are maple. In ’33, an L-5 would typically have two pieces of maple with a dark center lamination Gibson called “ebonized veneer” (many who have studied these instruments believe it to be stained pearwood) and though this has two pieces of maple, it has a very wide center rosewood lamination with two narrow ivoroid strips.
The semi-circular heel is also not typical of 1933, and the peghead shape is longer and significantly different in shape than any other Gibson. Though long, it’s not the same as a Super 400. A few 17″ Advanced model L-5s from the late ’30s were made with an identical peghead inlay used in the same manner with the same border, but they were standard L-5s except for the peghead inlay. The ebony fingerboard is typical of an L-5, but the inlays with rosewood blocks with pearl inlay and ivoroid borders are unlike anything on an L-5 (though there are some L-75 models with this pattern).
Joe Spann, author of Spann’s Guide to Gibson 1902-1941, has researched Gibson’s factory work orders, serial numbers, and shipping records, all of which indicate there were at least four of this model, all of which were shipped to New York Band, in Manhattan. There are also photos of Carl Kress holding one as an endorsement. Spann also points out this guitar was shipped from the factory in 1933. Like many of Gibson’s more-expensive instruments, it was likely returned to the factory by the dealer in an exchange program. The extant Gibson shipping ledgers show it was shipped a final time on June 22, 1937, as an “Old Style L-5” in a #515 case to New York Band.
In ’33, the L-5 was the top-of-the-line model in the Gibson catalog, costing $275 plus case. To put that in context, in the ’30s, a Martin D-28 was $100, a D-45 was $200, and this guitar certainly couldn’t have cost less than a standard L-5.
Carl Kress was a tenor- and plectrum-banjo player who transitioned to guitar in the ’20s. Working in New York at the height of the swing-jazz era, he was one of the fathers of early jazz guitar along with Eddie Lang and Dick McDonough, both of whom recorded duets with Kress. Much of Kress’ work was with popular bands of the era such as Paul Whiteman’s band, Jimmy Dorsey, and Tommy Dorsey. He was also a first-call session musician in New York City with the top bands of the day as well as an independent solo artist on guitar, and a true innovator of early jazz guitar.
This guitar was made in the early days of big-band popularity. Kress and many early jazz guitarists were banjo players who had converted to guitar. Rather than adapting to standard guitar tuning, Kress used what is thought to have been (low to high) Bb F C G B D – a compromise of tenor and plectrum banjo tunings with the addition of bass notes of Bb and F on the low strings. This gave Kress a unique sound, which stood out amongst his peers of the day and made his playing quite recognizable. The unconventional width and depth of the neck of this guitar seem to cater to this tuning and allow for the heavier-gauge strings to accommodate the two lowest strings. Similarly, the string spacing would be desirable for the unusual chord shapes required to play in this tuning, and allow for the unique bass note options. It’s a fascinating example of the segue from the jazz banjo (tenor/plectrum) to the jazz acoustic archtop guitar.
With the advent of the L-5 in 1923, there began a mass change within 10 years from banjo playing to guitar playing in the popular music of the day. This specific instrument from 1933 shows a holdover of the jazz banjo days with its banjo style inlays and custom design for banjo inspired tuning, and is a tangible representation of the transition that brought the guitar from the parlor and onto the stage.
This instrument is an interesting piece of Gibson history, with value far beyond its appearance or playability.
This article originally appeared in VG July 2013 issue. All copyrights are by the author and Vintage Guitar magazine. Unauthorized replication or use is strictly prohibited.
M&V Guitars and Pickups Atlas P Bass-Style Pickups
Price: $75
Info: www.mvguitars.com.
Let’s face it – when it comes to boutique pickup options, bass players have gotten the short end of the stick. And as for the venerable Fender Precision Bass, well there’s only so many ways you can put a new harness on the old warhorse.
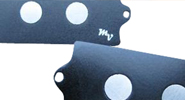
Enter M&V Guitars and Pickups, which offers proponents of the low-end theory a real alternative to stock P-bass offerings – the Atlas Large Pole Precision Bass pickup. What’s different about this pickup is M&V’s placement of four 0.375″-diameter Alnico-magnet pole pieces directly under the strings as an alternative to the traditional P Bass’ eight 0.1875″-diameter steel pole pieces energized by ceramic bar magnets and offset from the strings. The Atlas’ massive magnets are scatter-wound with 42-gauge enameled wire into coils registering a nominal resistance of 11k. The company says they sense string vibration over a much narrower range than the big-pole Music Man dual-coil humbuckers with series or parallel wiring, resulting in less frequency loss due to phase cancellation.
To our ears, it’s a punchier (and somewhat brighter in the treble settings) signal than stock P-Bass pickups. With a little downward EQ adjustment on the amp, the M&V-equipped P Bass sat nicely in the mix, but with greater clarity of note than we were accustomed to hearing, especially when playing up the neck. Though unmistakably Fender-ish, the tone in the upper registers is a bit reminiscent of the bridge pickup in a Rickenbacker 4001S – crisp and almost gated. For players looking for the Fender sound, but just a little more “in-front,” this may be just the ticket.
This article originally appeared in VG Overdrive issue No. 039. All copyrights are by the author and Vintage Guitar magazine. Unauthorized replication or use is strictly prohibited.
Dutch Kazoo Analog Fuzz Pedal
Price: $225 retail
Info: www.dutchkazoo.com
It’s not easy for a new boutique overdrive or distortion pedal to stand out in today’s thick fog of clipped signals, high gains, and crunchy fuzz. After all, properly tweaked, they all can be made to sound about the same, right? This may not be a winnable argument, engaged over a cold one, no matter which side of the distorted fence you sit on. Are you a Tube Screamer or a Blues Driver? A Big Muffy or a Fuzz Face? Or perhaps you’re one of those players who will let nothing come between your pickups and your preamp tubes except naked, electromagnetic signal. In other words, it’s fair to ask, “Does the world really need yet another fuzz pedal?”
Enter into the fray the Dutch Kazoo – an all-analog OD that’s hand-assembled by C Mandel. One thing’s for sure: the Dutch Kazoo doesn’t look anything like the other pedals on your board. First, it’s beefy – as in about the size of a wah pedal. Not only that, but the pedal’s housing is made from a routed-out block of solid hardwood, capped by an .125″-thick aluminum control plate that, depending on your preference, is painted white with blue, leafy designs. Said designs might feature bats, foxes, a female Cyclops (huh?), or, as one might be more incline to expect, kazoos. Regardless, the overall effect is that of a stompbox that could withstand the constant pounding of nightly gigging and double as a piece of Delft pottery hanging on your kitchen wall. Pretty cool.
The Dutch Kazoo is a two-stage overdrive. Individual volume knobs control the relative drive of each stage, and a blend pot dials in each stage’s contribution to the signal clipping. Drive 1 seems to work mainly on the low and mid frequencies, Drive 2 the upper-mids and highs. The tone pot affects the signal from both drive stages and, unlike a lot of OD pedals, this tone control has a noticeable effect. And it’s all mercifully intuitive. The single 3DPT stomp switch is true bypass and well out of the way of the knob controls, even for size 13 shoes. The LED light, indicating the pedal is in the signal path, is easy to see even in natural sunlight, and the pedal accommodates a 9-volt battery and a Boss-style wall-wart transformer (not included).
In testing, the Dutch Kazoo was run through a variety of tube amps and one solid-state beast. The guitars used were equipped with P-90s, Fender single-coils, various humbuckers, and a set of active pickups. The first thing that one notices is that the Dutch Kazoo is unusually quiet for an OD pedal, even with both volume knobs cranked. Second, the distortion is very touch-responsive. In front of tube amps and at low gain, it brings to mind a TS808 (which was A/B’d for this test), providing noticeable crunch while maintaining the amps’ intrinsic tones. High gain resulted in Randy Rhoads fuzz, very comparable to a MXR Distortion+.
Unlike most digital effects, this analog pedal accentuates the native signal rather than reinterprets it. Some great Hendrix-like fuzz was coaxed from a Strat as the Kazoo’s volume was dialed up. An old Peavey solid-state was converted into a passable vessel for Reverend Billy Gibbons-like sermons. At the other end of the spectrum, fully dimed and with a P-90-equipped Les Paul plugged into it, the Kazoo pumped and squealed in a most appealing Neil Young/Old Black manner. For full-out metal craziness, the Dutch Kazoo probably won’t be a pedal of choice, but overall, it delivers impressive dirt of all varieties while retaining the tone of each guitar and amp.
The Dutch Kazoo is a great-sounding OD/fuzz pedal. Could the same tones be summoned with other pedals or combinations? Probably. But how often will you get the chance to kick in fuzz tones by stomping on something that looks like it came out of your mother’s china cabinet?
This article originally appeared in VG March 2014 issue. All copyrights are by the author and Vintage Guitar magazine. Unauthorized replication or use is strictly prohibited.
Tom Feldmann and his handmade David Flammang L-1 copy.“And the Oscar goes to…”
If they gave out Academy Awards for the best guitar instructional film, Tom Feldmann’s latest on Robert Johnson would be a shoe-in.
We rarely review instructional videos, but this one is something special. And it’s more than just a how-to guide: it’s an in-depth, note-for-note documentary look at the playing style of one of the most influential bluesmen of all time. And for that reason alone – whether you’re willing to sell your soul to the devil to learn to play like Mr. Johnson or not – you owe it to yourself to check out Mr. Feldmann’s study.
Johnson of course needs no introduction, but Feldmann may to those not up on the blues. Based from a small town in Minnesota, he has immersed himself in traditional country blues stylings, releasing several CDs of his own recordings, plus a series of stellar how-to DVDs on Charlie Patton, Son House, Bukka White, and more. Few pickers today play these old-time blues so naturally and intuitively.
Feldmann’s long-antipicated Johnson set has been well worth the wait. First, the technical details. The package includes three DVDs with a total running time of 352 minutes – that’s almost six hours. And the songs are available in both tab and musical notation in pdf form on the DVDs as well.
Feldmann covers most all of the 29 songs that Johnson cut in 1936-’37. He organizes his lessons by guitar tunings – standard, drop D, cross-note, Spanish, and Vestapol.
He then makes sense of the song similarities by organizing them into variations on themes. For instance, he goes through “Kind Hearted Woman” in patient detail, then explains how Johnson used that song form to create variations, seguing into explanations of “Phonograph Blues,” “32-20 Blues,” and several others. He also explains the efficacy of fingerings and the why behind the how. This logical approach makes understanding and playing the songs dramatically clearer.
As a teacher, Feldmann is ideal; as a blues historian, he’s downright heroic. His understanding and explanation of Johnson’s playing – as well as the other country blues greats – is masterful.
It’s also insightful, and this will be a reason that Feldmann’s films endure. No need to traipse to a crossroads at midnight and strike a bargain; just pop Feldmann’s DVDs into your player. Maybe this takes away some of that romance, but fear not – there’s still hours and hours of good old woodshedding left.
This article originally appeared in VG‘s Nov 2014 issue. All copyrights are by the author and Vintage Guitar magazine. Unauthorized replication or use is strictly prohibited.
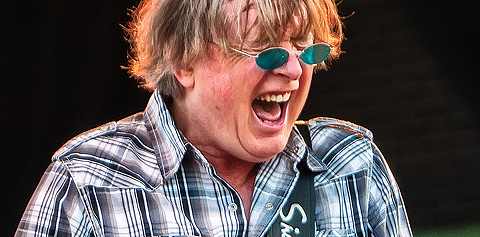
Ian Hunter is upbeat when he discusses his newest album, Man Overboard, and the upcoming reunion with old friends in England for a series of 40th anniversary reunion concerts planned for this fall by Mott the Hoople, the legendary British hard-rock band Hunter fronted from 1969 to the mid ’70s.
The album hints the veteran musician is getting a bit more active of late, as it’s his second release in a two-year span (following Shrunken Heads, from 2007). Asked how Man Overboard differs from Shrunken Heads, Hunter chuckled, “I don’t really know. People are perhaps thinking it’s a companion piece, but it’s more like a regular album… though maybe a tad more autobiographical. I really had a good time making Shrunken Heads – there was such a good vibe in the studio. So I decided to pop back in!”
While recording acoustic-guitar parts for Man Overboard, Hunter played a Gibson Jumbo and a 12-string Takamine. He recounted that the Takamine was “…easy to play, and it records really well. Sometimes I use it to write; it often sounds like a low-volume electric.”
Several tracks also feature baritone guitar played by various other guitarists, as well as banjo and mandolin.
Man Overboard’s title track is intriguing, with its “wavy” 3/4 time signature. Hunter wrote the lyrics first, though, and the choice of time signature wasn’t necessarily intentional, though he acknowledges it serves the song well.
The album has its share of typical Hunter commentary (“Politics is never ending,” he observed dryly to VG), as well as straight-on rockers like “Arms & Legs” and “Up and Running.” There are also quieter, more reflective tunes such as “These Feelings” and “Way with Words,” as well as a sarcastic look at modern business environments (“The Girl from the Office”).
All in all, Man Overboard contains the type of songwriting and arrangements that have always served Hunter well throughout his solo career.
However, one line in “Up and Running” will strike many as prophetic, as they’ll surmise the line that states “I think I need another boost o’ Mott the Hoople juice” alludes to the reunion concerts in England slated for October. Hunter clarified that he wrote the song before the reunion concerts were finalized, but added that he was looking forward to the shows.
Mott the Hoople was a British hard-rock aggregation that, in the eyes of many longtime fans, never received its due acclaim. The band began releasing albums in 1969, but didn’t break out of cult status until its fifth effort, All the Young Dudes (produced by David Bowie) was released in ’72. The original lineup consisted of Hunter on vocals, guitar, and piano, Mick Ralphs on guitar and vocals, Pete “Overend” Watts on bass, Dale “Buffin” Griffin on drums, and Verden Allen on keyboards.
Ralphs was a ferocious lead player who favored Gibson Les Paul Juniors, Watts was usually seen with a Gibson Thunderbird, and Hunter played Guild S-100s, more than one Gibson model, a rare Sardonyx guitar, and a custom-made instrument shaped like an H. Hunter had chronicled his jones for old Gibson guitars in his book Diary of a Rock ‘N’ Roll Star (first published in 1974, and reprinted several times since), and told VG he still appreciates such instruments.
By the time of All the Young Dudes, personnel changes were in the wind, and Allen left after that album’s release. The band subsequently went through other membership changes – Ralphs helped form Bad Company and Hunter began his solo career.
Curiously, Hunter confirmed that the idea of getting together some reunion shows with the original members for the band’s 40th anniversary was Allen’s.
“That’s the funny thing about it,” Hunter reflected. “I was doing an acoustic tour in England, and he turned up. He started talking about the 40th anniversary comin’ up; I hadn’t even realized it. It was one of those ‘If we don’t do something now, we never will’ ideas. We’d actually gotten together a few times over the years, but decided not to do any shows.”
As it turned out, Ralphs had to pull double reunion duty by teaming with Paul Rodgers and Simon Kirke on a brief Bad Company reunion tour in June and July. Original Bad Company bassist Boz Burrell died in 2006; the bassist for Rodgers’ solo band, Lynn Sorenson, is holding down the low end, and Howard Leese, formerly with Heart, and also with Rodgers’ backing band, is playing second guitar.
“I’ve gotten e-mails saying he’s really, really good.” Hunter said of Ralphs’ recent efforts.
The Mott the Hoople reunion shows were originally slated for just two nights in October at HMV Hammersmith Apollo in London. However, demand for tickets pushed the number of performance evenings to five.
Hunter is looking forward to rehearsals with his former Mott bandmates, and predicted with a chuckle that they would probably not want to rehearse too much “…because we’re not that kind of a band!”
He also left open the possibility that the band might take further steps beyond the Hammersmith concerts, such as recording some new material, but added that future plans aren’t being discussed, as the members were anticipating the October shows and not looking beyond them… yet.
“We’ll see what happens,” Hunter said.
This article originally appeared in VG October 2009 issue. All copyrights are by the author and Vintage Guitar magazine. Unauthorized replication or use is strictly prohibited.
Compared to Martin’s longstanding factory location in Pennsylvania, Guild’s acoustic guitar factory has been a gypsy. The company first produced guitars in Hoboken, New Jersey, before moving to Waverly, Rhode Island, then to Corona, California, followed by Tacoma, Washington. Today, New Hartford, Connecticut, is home base for the Guild’s Custom Shop acoustic factory, and to celebrate their 60-year anniversary, Guild has introduced a new line of acoustics from the Custom Shop called the Guild Orpheum series. Currently there are 10 guitars in the Orpheum line, from a limited-edition Koa-bodied anniversary model to a jumbo to orchestra models to dreadnoughts, including the Slope Shoulder 14-Fret Rosewood model.
Ren Ferguson, who was the head luthier at the Gibson Montana acoustic division for many years, was responsible for all the Orpheum flat-top designs as Guild’s “Chief Engineer Acoustics Research and Development.” The original idea for the Orpheum series, however, came from Larry Thomas, Fender’s chief executive officer. According to Ferguson, “Larry Thomas wanted a ‘compelling’ series of guitars that would hearken back to the 1930s era, with all the traditional appointments of that period.”
Unlike at Gibson, where he had not been permitted to stray far from existing and historical models, Ferguson was “liberated” from any historical design restraints for the Guild project. After drawing the preliminary designs and taking the recipe from the ’30s era, he took them from his home in Montana to the plant in New Hartford, where they hand-built the prototypes. Ferguson then spent most of 2012 traveling every two weeks to New Hartford.
Because Guild didn’t exist in the 1930s, much of the inspiration for the Slope Shoulder 14-Fret Rosewood Dreadnought came from other manufacturers’ vintage models. The Gibson influence is obvious – both in the Guild’s physical dimensions and its overall harmonic character, though the Guild Orpheum is not merely a clone of any existing Gibson guitar’s feel or sound.
The Orpheum Slope Shoulder 14-Fret Rosewood has a solid Adirondack red spruce top, solid Indian rosewood back and sides, a three-piece rosewood and mahogany neck, ebony fretboard, ebony pyramid-style bridge with a compensated bone saddle, bone nut and bridge pins, red spruce bracing, hide glue, an artificial tortoiseshell pickguard, Gotoh vintage-style gold-plated tuners with the Guild logo engraved on their buttons, and a bound fingerboard. It is finished in a gloss nitrocellulose lacquer. The guitar has a 25.5″ scale length and a unique neck profile that recalls a 1960 ES-335 – a bit wide with an oval profile.
The overall fit and finish on the Orpheum is excellent. The unique colored marquetry used on the backstripe, top binding, and rosette are intricate yet understated, as are the dot inlays. The headstock is intentionally smaller than most contemporary designs and the newly created vintage-style Guild logo on the headstock is also intended to recapture an older vintage vibe. The Orpheum’s overall build quality rivals the best factory guitars from Gibson, Martin, and Taylor. The setup as it came from the factory was fine-tuned to the point where further adjustment would have been superfluous.
Some large-bodied guitars sound muddy when pushed with a more aggressive right-hand attack, but not so for the Orpheum. Anyone looking for that vintage Martin “cannon shot” bass, as the late Charles Sawtelle called it, will find the modern equivalent in the Orpheum. On the other end of the dynamic spectrum, the Orpheum responds to a light right-hand touch with a cornucopia of subtle overtones and upper harmonics.
In the last 20 years, there have been “vintage reissues” from every major guitar manufacturer, and some, such as the Gibson Advanced Jumbo, come strikingly close to the original. But few manufacturers have attempted to build a vintage-style instrument from scratch based not on an existing design but on a blank slate inspired by “best practices” of ’30s luthierie. The Guild Orpheum Slope Shoulder 14-Fret Rosewood Dreadnought is a bold and successful new direction – not just for Guild, but flat-tops, in general.
This article originally appeared in VG June 2014 issue. All copyrights are by the author and Vintage Guitar magazine. Unauthorized replication or use is strictly prohibited.
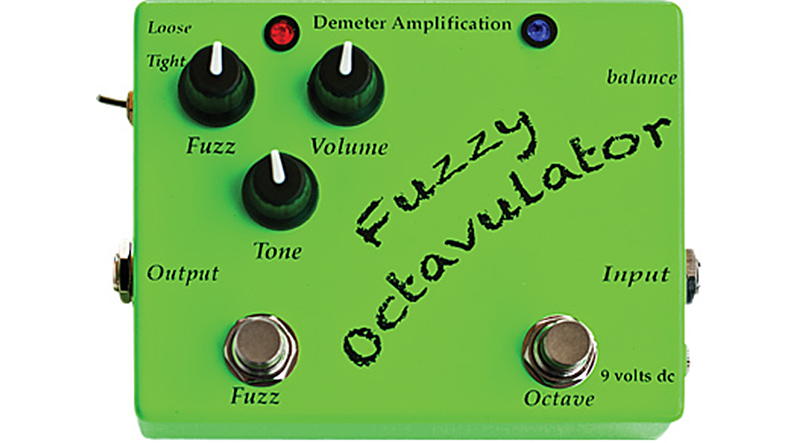
James Demeter has a long history in the amp and effects biz. His project-boxed/Dymo-labeled Tremulator pedal pre-dates the ’90s boutique pedal explosion by more than a decade. During his 30 years of 100-percent analog designs, Demeter has produced everything from studio-quality rack effects and multichannel tube amps to a wide variety of first-class vintage-flavored stompboxes that can be found on the pedal boards of the rich and famous. The FZO-1 Fuzzy Octavulator uses Demeter Amplification’s highly regarded Fuzzulator circuit, and also offers an Octavia-style high-octave effect that can be used in conjunction with the fuzz and on its own.
The FZO-1 features the standard Fuzz, Tone, and Volume controls, as well as on/off Fuzz and Octave footswitches. Two LEDs indicate which circuit or circuits are active, and a side-mounted mini-switch with Loose and Tight positions changes the character of the fuzz via germanium (Loose) and LED (Tight) clipping stages.
Along with input and output jacks, the FZO-1 has a side-mounted trim pot labeled “Balance” that adjusts the overall output stage of the pedal to allow the user to goose up the output if they tend to stay in the lower-output Loose mode, or to back it down if they settle in on Tight. Under the hood, the pedal is very neatly wired, utilizing through-hole construction, which means unlike surface-mount designs, this pedal is repairable rather than being consigned to junk if a grain-of-sand-sized cap or resistor decides to quit. Additionally, all pots and jacks are chassis-mounted instead of board-mounted, giving the pedal much greater durability. The pedal can operate on either a 9-volt battery or DC power supply.
The Octavulator was tested with a Les Paul and a Strat-style guitar and both a Fender Deluxe Reverb and a Vox AC15. Beginning with the fuzz section dialed into a low Fuzz setting, all three knobs showed very useable ranges, producing a wide variety of fuzz levels and the ability to match or boost from bypass level. The Tone knob certainly aided in the switch from single-coils to humbuckers, while the Tight/Loose toggle allowed switching between two very distinct vintage fuzz flavors. But, the Tight setting proved the favorite for full-on fuzz because it stayed tight and useable, never getting bass-heavy or out of control. Not to say that the Loose setting really loses anything – it merely has a bit more harmonic swirl going on and a bit more cushion to the attack. In fact, with the Fuzz level set low, the Loose setting produced a wonderfully natural overdrive flavor.
Activating the FZO-1’s octave section brought on all the Octavia-styled tones that one would hope for, with one exception: The octave actually tracks anywhere on the neck. With vintage Octavias, as well as copies, tracking can be somewhat dubious and very sensitive to the type of pickup, pickup position, and where on the neck the instrument is played. The FZO-1 suffers none of those limitations. Another bonus is the option of activating the octave section alone, a feature that most fuzz/octave pedals do not allow. By itself, the octave can create unique clavinet and other keyboard-styled tones using various pick and finger techniques that create tones both ear-catching and useable.
The FZO-1 Fuzzy Octavulator is a fantastic-sounding and highly versatile pedal that offers the player the ability to switch between two distinct clipping flavors and to use the fuzz and octave either together or separately. The warm and vintage-style fuzz unit also happily excels as an overdrive, and the octave’s spot-on tracking gives it a huge leg up over the old-school Octavia.
This article originally appeared in VG June 2014 issue. All copyrights are by the author and Vintage Guitar magazine. Unauthorized replication or use is strictly prohibited.
Mike Piera, a.k.a. Analog Man, is known for creating pedals with a vintage flavor. Clients include guitarists who want to achieve that classic “tight” or “squashed” guitar signal associated with players like Lowell George and Mark Knopfler, as well as a multitude of country pickers.
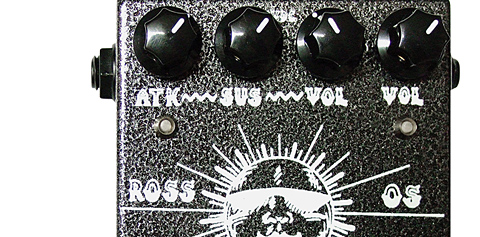
For guitarists who must have more than one compressor option, Piera created the Bi-Comprossor, which improves upon and combines the best qualities of the Ross Compressor and the Dan Armstrong Orange Squeezer. Each can be used separately or together via dual 3PDT stomp switches.
Actuated by the left footswitch, the Ross side is similar to an MXR Dyna Comp but with better sustain. It features new-old-stock (NOS) 2SC1849 Matsushita transistors of the type used in the original Ross Compressor and Dyna Comp, yet is cleaner-sounding and has more sustain (though it lacks the Squeezer’s earthiness). The right footswitch (the “OS” side) uses NOS 2N5437 transistors, 1N100 diodes, and a JRC4558 chip for increased smoothness. It compresses the attack of each note with a natural-sounding decay increase and yields the compressed signature grit heard on Steely Dan and Dire Straits records.
With its eyecatching graphics, the Bi-Comprossor is a true-bypass pedal that takes a 9-volt DC adapter or battery. Its Attack knob (identical to the original Ross pedal setting) allows the player to adjust the balance between squashed and percussive, while the Sustain knob adjusts the amount of compression and sustain. Higher settings increase volume and compress the signal, and have the same parameters as the original Ross and Dyna Comp. The left Volume knob is for the Ross mode, and the right Volume is for the OS. The Bi-Comprossor also has a red LED for the Ross and a yellow for OS.
The Bi-Comprossor was tested in conjunction with a Telecaster, a superstrat, and a selection of combo amplifiers. Beginning with the knobs set to 12 o’clock, the Ross side provided a volume increase and severe cut of the low and high frequencies – perfect for tight chicken pickin’, Rickenbacker jangle, and punchy sounds that pop from the mix.
The OS side is more intense and chokes off the peaks of low frequencies. The difference in how the two sides handle low end is very discernible; the OS is concentrated, thick, and exaggerated, while the Ross side is more subtle. Used together, the two functions can create some wickedly tight but smooth tonal variations for any number of live playing or recording situations.
The Analog Man Bi-Comprossor does a great job of dialing in a plethora of clean boost, subtle compression, or maximum strength squish. If you want transparency, look elsewhere. If you want improved tonal quality in a sturdy little package, look no further.
This article originally appeared in VG June 2014 issue. All copyrights are by the author and Vintage Guitar magazine. Unauthorized replication or use is strictly prohibited.


 Curiously, Hunter confirmed that the idea of getting together some reunion shows with the original members for the band’s 40th anniversary was Allen’s.